Showing posts with label Christmas. Show all posts
Monday, January 2, 2012
Gnawing at the Walls- Gingerbread House (recipe)
Continuing my immersion into all things gingerbread, I made my very first gingerbread house. Just like any other house (I would imagine) it takes proper measurements, planning, patience and lots and lots of mortar, or in this case, icing.
Be prepared. Have a serrated knife, a form or a really good eye for measurements and some free time. You can be as creative as your mind, budget and supplies allow. Since I have access to a couple candy stores, I was in good company.
Have all your basics ready to go (e.g. your base for the house, your royal icing, your gingerbread dough, and things to brace your house while building and allowing the icing to dry). If you are ready, it will be less frustrating and your roof will more likely than not remain attached.
What you will need (mind you, this IS an art project, my suggestions are just that, suggestions).
1) Board for the house. I went to my local craft store and found a foam poster board that I cut in half and covered with aluminum wrap. This way, I can use it again once this one has been consumed.
2) Royal Icing:
Ingredients:
3 tablespoons meringue powder (you can find it at your craft store or specialty food store)
4 cups powdered sugar
6 tablespoons warm water
piping bag(s) or plastic sandwich bags with a sealing device (e.g Ziploc)
food coloring for coloring icing
Preparation:
In a large bowl combine all ingredients and beat using a handheld mixer until the icing forms peaks. approximately 10 minutes.
DO NOT LEAVE UNCOVERED ONCE READY. It is your mortar, it will solidify and become useless if you leave it out. Put it into your uncut piping bag and seal it or place it into a airtight container.
Gingerbread Dough Preparation- dough can be made the day before:
Ingredients:
6 cups flour
1/2 teaspoon baking powder
1 teaspoon baking soda
1 cup butter (unsalted), softened
1 cup brown sugar
4 teaspoons ground ginger
4 teaspoons cinnamon
1 1/2 teaspoons ground cloves
1 teaspoon black pepper
1 1/2 teaspoons salt
1 1/2 dark unsulfured molasses
2 eggs
Preparation:
Sift together the flour, baking soda and powder in a bowl, something large enough to hold 6 cups of flour. (the "Dry Ingredients")
In a separate large bowl, combine the butter and brown sugar. Once well creamed, add all the spices (including the salt and pepper). Beat in the eggs and molasses. (the "Wet Ingredients")
Slowly add the Dry Ingredients to the Wet Ingredients. Mix until well combined.
Break the dough up into approximately 1/3s, wrap each separately in plastic wrap pressing it flat and round (for easier rolling later) and refrigerate for at least 1 hour (or overnight).
When the dough (and you) are ready, preheat the oven to 350 degrees Fahrenheit.
Only take out the 1/3 you are planning on working with. That way the other pieces stay solid. Roll out the dough on a well flour dusted space. Have your forms ready to go. If the dough is sticky, put it back in the refrigerator.
Roll the dough out to approximately 1/4 thickness. Place your forms on the dough and carefully cut out your shapes. Use a sharp knife- it just cuts cleanly. Cut your windows and doors out at this point. Be as creative as you want. Place each cut out on your parchment covered cookie sheets. Chill on the cookie sheets for 10 minutes or so, if you can. Not necessary, just helpful.
If you want to get fancy, you can crush up hard candies and place them in your window openings to get the stained glass affect. Any color will do. I used suckers, but any hard candy will do. This is great if you are planning on lighting your house (or adding the battery operated candles)
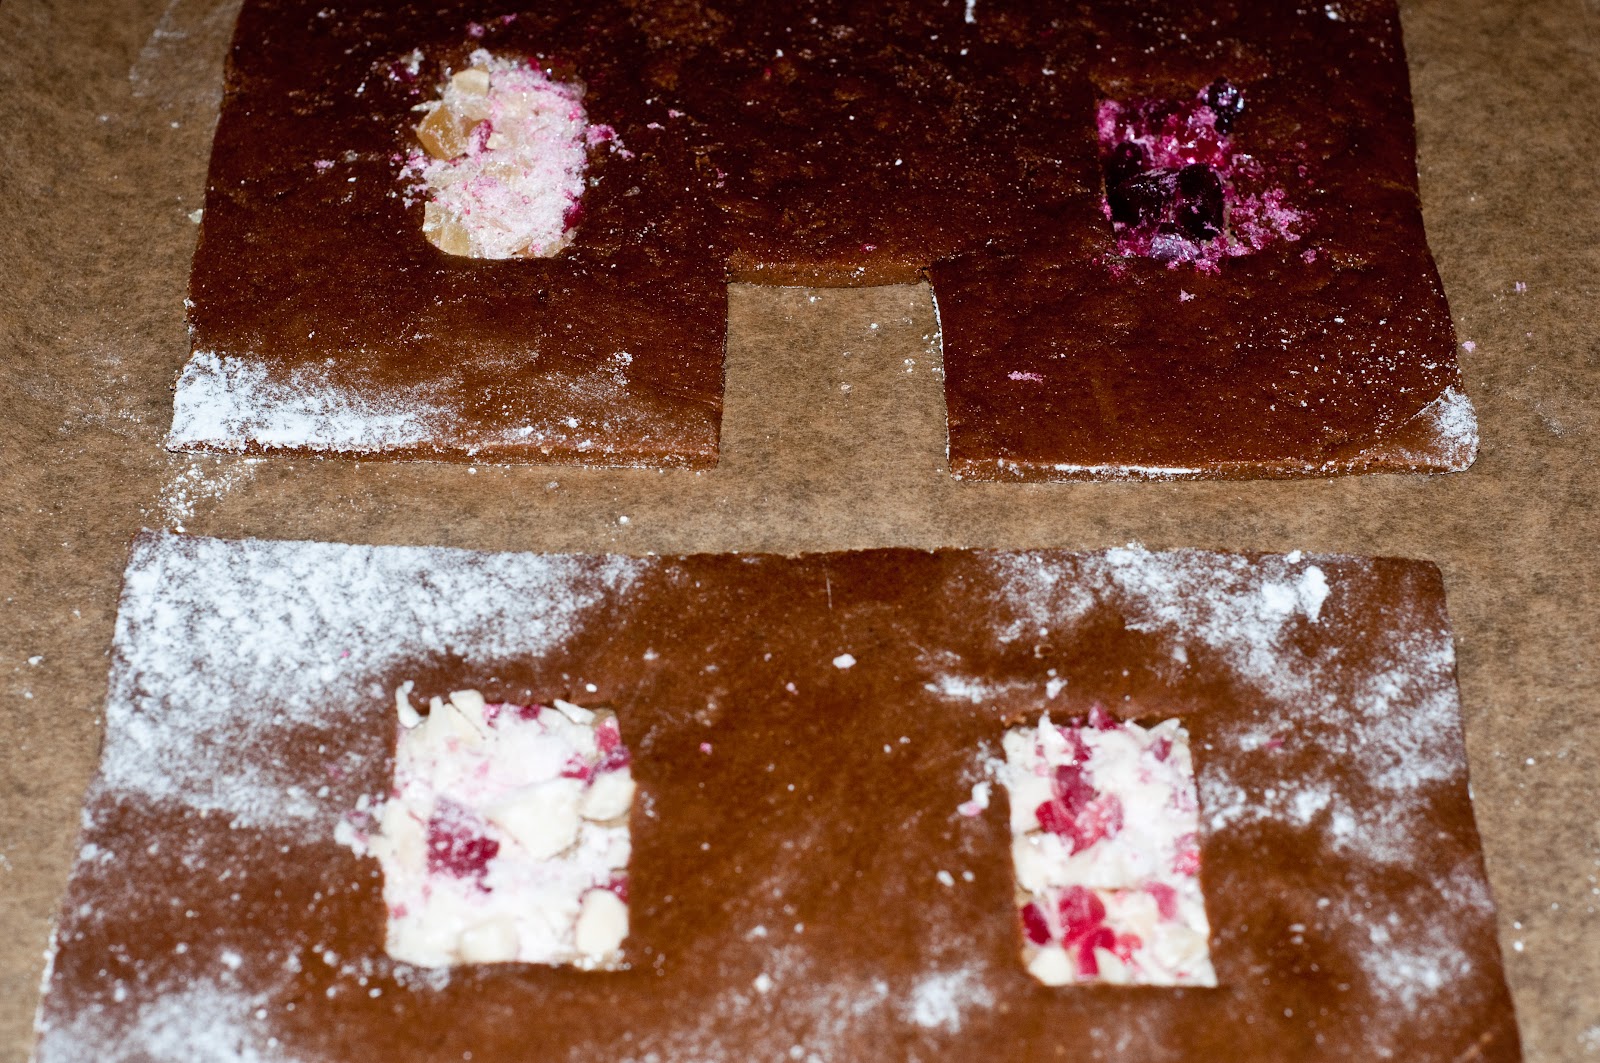
Bake for approximately 15 minutes, or until firm.
Remove from cookie sheet, once slightly cool enough to touch, use your cutting board and serrated knife to clean up the edges. Saw at the pieces gently, you don't want to break it into pieces. It will make it significantly easier to build your house with clean lines. Then place on cooling rack and allow to completely cool.
It will take a couple rounds of cutting and baking to make your entire house.
Construction of your edible home:
Have your icing ready, cut a SMALL hole in the piping bag. Small is better. Place your decorating board on a flat surface and have all of your home pieces ready to go in the same location, along with supporting props (e.g. cups, books, jars, whatever will help hold the walls straight while the icing is drying.
Generously ice the bottom of your first wall. Place it firmly on the board. Then along the base of the board and the first piece, pipe more icing. Have your supporting prop next to the first side for this.
Next, ice the bottom and corresponding side of the second piece of the house to form a 90 degree angle. Press the second piece firmly, yet gently to adhere to your first piece. again, have your prop ready.
Keep adding your sides like this. Wait until your walls are fully secured and dried before you add the roof. You don't want it to collapse after all that hard work. It will take between 4 to 8 hours depending on the humidity to become secure enough to add the roof.
Once dry, you can begin decorating the roof of the house and its surrounding area. I wanted a wintery scene so I added some further decorations.
Candies and such used:
ice cream cone (tree)
white chocolate covered malted balls,
hard candies, blue for creek
vegan marshmallows, snow bank
graham cracker sticks for wood pile
candy covered chocolate rocks for walkway
yogurt covered pretzel stars and balls for house decoration
marzipan for dog and cat
cinnamon toast crunch cereal for the thatched roof
shredded coconut for snow
to add the snow and make it stick, you can thin out some of the icing by placing a teaspoon of icing in a small container and adding water until it is quite thin. Then, with a basting brush, paint with the icing where you want the "snow" to be.
It is a great project and lots of fun. Some great sites where I found some ideas, tips, recipes, and most important forms, are found here, and here, and here and here.
Saturday, December 31, 2011
A Silent Night Broken By Song
Rarely do the holidays evoke anything more than commercial harassment, accentuated by the grumpy red eyed shoppers, who in the spirit of giving, trample each other to get that last hideous holiday sweater for the family dog.
This year, I wanted to see the other side. The side of people that made me not despise the whole of the human race. Oddly enough, one of the activities was sent to me via e-mail from my local events committee. Apparently, there would be caroling at the "Bean" (aka Cloud Gate, which sounds like a sequel to Watergate, but I digress...).
On the last Friday performance, I bundled up and headed out of my office, happy to leave off the long hours of staring at a computer to see how the rest of the world was spending this holiday season.
Upon arriving, I was shocked. A crowd had already formed, smiling and cheerful, and oddly polite. There were patient lines for free hot cider, the coffee and hot cocoa having already been chosen and consumed by those who arrived earlier. Another group of volunteers handed out song books and cupped candles.
People waited their turn, said please and thank you- all of this out of the ordinary for the holidays.
Once the choir began, a hush spread across the expectant crowd.- without the requisite pushing to get into a better position. The crowd listened to instruction and obediently turned to the various pages to sing along with the Wicker Park Choir. Children danced and leapt around, watching their reflections moving this way and that in the surface of the Bean.
And when the last song was sung, the last applause complete, people parted in an orderly manner moving passed the ice skating rink and their other fellow patrons, still warmed by the congeniality of the singing and community, not to mention the hot beverages, experienced all in the name of the holidays upon us.
Here's to hoping that your holidays had a moment of calm, clarity and serenity that will last you throughout the coming year.
Happy New Year All!
Tuesday, January 4, 2011
The Christmas (Veg) Dinner, Part I
Although fleeing to somewhere warmer where I could hide until the holidays passed seemed like a brilliant idea, I stayed home this year and hosted Christmas dinner. Cooking for my family can be a bit of a challenge. My father has a more classic palate, while my mother is cautiously adventurous when it comes to food; then there is my brother and his girlfriend- if meat is not attached to whatever the meal is, it is cause to fret and wonder what on earth I may be feeding them. This year, with my Christmas dinner debut, I believe I successfully satisfied my mélange of guests.
To begin, I served a simple mixed baby greens salad with a balsamic dressing, classic and simple, but still able to hold its own. Next, for my dad, baked ziti. Because I believe a little heat can add another dimension to any meal, my pasta sauce includes chilies- just enough to give a bite, let you know they are there and warm your blood in these cold, dark months. Simple meals, but good, stick to your bones type stuff. Where I got adventurous was the other meal. Yes, I served two separate meals at my dinner-could it be any other way?
The second meal included Portobello Wellingtons with Madeira sauce, mashed potatoes with leeks and a touch of nutmeg and lemon haricot vert with almond slices. The Portobello Wellingtons with Madeira sauce are not for the faint of heart- these gems are labor and time intensive- without the holiday dinner debut looming over me, I don’t know if I would have attempted these. I wanted to wow my guests and these did it.
Knowing what was ahead of me, I paced myself. I began my pasta sauce the night before.
Pasta Sauce:
1 bulb of garlic, diced
1 large onion, diced
2 large cans peeled tomatoes
1 can tomato sauce
6 fresh Roma tomatoes, diced
Red wine
Fresh basil
Italian herb mixture
Salt
Black Pepper
Hot dried chilies
3-4 bay leaves
Olive oil
Sauté onion in 2-3 tbs olive oil until transparent in a thick bottomed stock pot, toss in the diced garlic. Once both the garlic and the onions are sautéed, add the fresh diced tomatoes and allow those to cook for several minutes before stirring in the 2 large cans of peeled tomatoes, the can of sauce and bay leaves. Pour in wine (approximately 1 cup or to taste). Let cook for 10 minutes stirring occasionally to avoid burning the sauce.
At this point, add basil, salt, pepper, hot chilies and the Italian herb mixture, all to taste. A good rule of thumb is to not over do it with the herbs and such- you can always add more as you go, but removal is almost impossible. Allow to simmer for at least an hour, stirring periodically.
After I remove the bay leaves, I puree my sauce with an immersion hand blender. It balances out the flavors and gives a nice texture to the sauce. Once finished blending, place the pot back on the flame and allow the sauce to simmer another 30 minutes or longer depending on desired thickness. Knowing I am adding this to pasta that will end up in the oven, I will make the sauce a little thinner because the oven will cause its own evaporation and thicken the sauce up a bit.
Once the sauce is “done” you can either serve it with pasta, let it cool and freeze it for later, or let it cool and place it in the refrigerator for use within the week. As a general rule, the sauce is always better the second day and, as with this batch, I allowed it to cool and then placed in the refrigerator for the following day’s final preparations for the baked ziti- after, of course, giving the sauce a trial run with a little pasta, along with a good red wine, such as Jazz.
I left the remaining, more daunting Portobello Wellington recipe for the coming day. To be continued…
To begin, I served a simple mixed baby greens salad with a balsamic dressing, classic and simple, but still able to hold its own. Next, for my dad, baked ziti. Because I believe a little heat can add another dimension to any meal, my pasta sauce includes chilies- just enough to give a bite, let you know they are there and warm your blood in these cold, dark months. Simple meals, but good, stick to your bones type stuff. Where I got adventurous was the other meal. Yes, I served two separate meals at my dinner-could it be any other way?
The second meal included Portobello Wellingtons with Madeira sauce, mashed potatoes with leeks and a touch of nutmeg and lemon haricot vert with almond slices. The Portobello Wellingtons with Madeira sauce are not for the faint of heart- these gems are labor and time intensive- without the holiday dinner debut looming over me, I don’t know if I would have attempted these. I wanted to wow my guests and these did it.
Knowing what was ahead of me, I paced myself. I began my pasta sauce the night before.
Pasta Sauce:
1 bulb of garlic, diced
1 large onion, diced
2 large cans peeled tomatoes
1 can tomato sauce
6 fresh Roma tomatoes, diced
Red wine
Fresh basil
Italian herb mixture
Salt
Black Pepper
Hot dried chilies
3-4 bay leaves
Olive oil
Sauté onion in 2-3 tbs olive oil until transparent in a thick bottomed stock pot, toss in the diced garlic. Once both the garlic and the onions are sautéed, add the fresh diced tomatoes and allow those to cook for several minutes before stirring in the 2 large cans of peeled tomatoes, the can of sauce and bay leaves. Pour in wine (approximately 1 cup or to taste). Let cook for 10 minutes stirring occasionally to avoid burning the sauce.
At this point, add basil, salt, pepper, hot chilies and the Italian herb mixture, all to taste. A good rule of thumb is to not over do it with the herbs and such- you can always add more as you go, but removal is almost impossible. Allow to simmer for at least an hour, stirring periodically.
After I remove the bay leaves, I puree my sauce with an immersion hand blender. It balances out the flavors and gives a nice texture to the sauce. Once finished blending, place the pot back on the flame and allow the sauce to simmer another 30 minutes or longer depending on desired thickness. Knowing I am adding this to pasta that will end up in the oven, I will make the sauce a little thinner because the oven will cause its own evaporation and thicken the sauce up a bit.
Once the sauce is “done” you can either serve it with pasta, let it cool and freeze it for later, or let it cool and place it in the refrigerator for use within the week. As a general rule, the sauce is always better the second day and, as with this batch, I allowed it to cool and then placed in the refrigerator for the following day’s final preparations for the baked ziti- after, of course, giving the sauce a trial run with a little pasta, along with a good red wine, such as Jazz.
I left the remaining, more daunting Portobello Wellington recipe for the coming day. To be continued…
Labels:
Christmas,
dinner,
holidays,
pasta sauce,
recipe,
vegetarian
Subscribe to:
Posts (Atom)


