Showing posts with label recipe. Show all posts
Sunday, May 20, 2012
Pain Perdu (aka French Toast), Asparagus and Orange Butter sauce (Recipe)
Last Sunday, since my family celebrated Mother's Day on Saturday, rather than Sunday (less competition at restaurants), my friend and I had our own non-Mother's day brunch. Along with the mimosas, complements of my friend, we also had French toast (Pain Perdu) with asparagus and a lovely orange beurre blanc sauce with a fresh strawberry salad to cut the heaviness of the French toast dish. All about balance, right!?! I recently have gotten into making normally sweet things, savory. (More to come on that front, promise!)
(This recipe will yield enough for 2, you can double it- no problem!)
Ingredients:
1 bunch of asparagus
olive oil
salt and pepper
Preparation:
Preheat the oven to 475 degrees. Then, wash the asparagus well (tends to have sand in the tips). Place in baking dish and drizzle olive oil and roll the baking dish back and forth to coat same. Add salt (since this was a special occasion, I used my red volcanic salt, but regular salt will do.) and pepper. Bake for 7ish minutes, depending on the size of your asparagus. I prefer it to remain firm, yet cooked. It is easier to cut into pieces later. Once cooked, slice into 1-2 inch pieces and put on the side.
Next, prepare the French Toast mixture.
Ingredients:
2 eggs
1/2 heavy whipping cream
1/2 teaspoon lemon zest
1/4 teaspoon freshly ground nutmeg (optional)
1/4 teaspoon salt (or to preference)
1/4 teaspoon pepper (or to preference)
6 slices of French bread, the good crusty kind, cut into 1 inch slices. (suggestion- cut it the night before and leave it out so that it will be extra absorbent)
Preparation:
In a bowl, whisk together all the ingredients (except the bread), transfer to a bowl that has enough surface area to accommodate your 6 bread slices. Place your bread slices in the mixture for 3 minutes each side to absorb thoroughly. While soaking the bread, preheat the large skillet, and margarine. Make sure the skillet's heat is even before placing your egged bread into it. Cook until each side is nicely browned.
The Sauce:
3/4 cup white wine (I used Sauvignon Blanc)
1/4 cup orange juice (fresh or squeezed- depending on what you have around and if you want to get a little fancier, you can switch the regular orange juice out for blood orange juice- it will be a little more tart)
1 thinly sliced shallot (or again, for a slightly different taste, you can use a small white onion, diced)
1/4 cup heavy whipping cream
1/2 teaspoon of orange or lemon zest
6 tablespoons of butter
salt and pepper to taste
2 tablespoons more of orange juice
Preparation:
In a skillet, bring to a boil wine and juice. Add shallots or onion. Allow to reduce (about 10-15 minutes) until approximately 1-3 tablespoons (don't measure it, just eye it). Whisk in cream and allow to reduce again until approximately 1/8th cup. Reduce heat to low. Add butter, one tablespoon at a time. Once all the butter has been combined, you can either strain the mixture or if you want the added texture of the shallots, you can skip the straining exercise and add the 2 tablespoons of juice and the zest, then salt and pepper to taste.
If you decide to strain the mixture do so into a heat-proof bowl to avoid shattering. Then add zest and remaining juice. Once sauce is complete, you are ready to plate.
(If you decide to include a salad, prepare that beforehand as to not waste time after.) I included just a simple strawberry salad- mixed greens with sliced fresh strawberries and a simple vinaigrette.
Enjoy!
Tuesday, May 15, 2012
Chik'n cutlets and mushrooms in lemon white wine sauce (Recipe)
In continuation of yesterday's meal preparation, here is the recipe for the Quorn Chik'n cutlets and mushrooms in lemon white wine sauce:
Ingredients:
1 package (4 pieces) Quorn naked chik'n cutlets
1 tablespoon butter (or margarine)
2 tablespoons olive oil
1 cup sliced mushrooms
½ cup diced onion
3 cloves diced garlic
1 cup white wine
1 cup vegetable stock
Sprigs of parsley chopped
Salt and pepper to taste
¼ cup lemon juice
Heat skillet. Once the heat is balanced, add your butter and olive oil. Allow butter to melt, then add garlic and onion. Once the onion is translucent add your chicken pieces. Cook until browned. Toss in mushrooms. Mix in the wine and stock; add salt and pepper. Allow to simmer. Add lemon juice. Cook until there is only a small amount of liquid left in the pan.
Place on top of pasta and sprinkle with parsley or prepare potatoes and greens to have along side. This recipe is quite a versatile addition to lots of meal combinations. You could also add this to a nice salad. Endless possibilities!
Labels:
Quorn,
recipe,
vegetarian
Monday, May 14, 2012
Kale Pecan Pesto (Recipe)
A couple nights ago I realized I have very little in my refrigerator that easily screams dinner. Throwing aside my go tos, I decided to be creative. The following recipe is what I created...
Kale Pecan Pesto
Ingredients:
1 bunch of roughly chopped curly kale (steamed)
½ cup coarsely chopped pecans
5-7 cloves of garlic
1 large lemon
½ cup white wine
Salt and pepper to taste
½ tsp Chili powder (optional)
½ cup shredded parmesan cheese (or less- up to you)
1 cup olive oil
Preheat oven to 425 degrees. Wrap garlic and pecans in foil and place in oven for approximately 20 minutes.
In a food processor, combine the steamed kale, pecans and garlic, pulse until well blended. Using a spatula, scoop off the sides of the processor to make sure all is well combined. Add parmesan, salt, pepper, chili powder and lemon zest and again pulse until mixed. Again, remove any stray pesto mixture from the sides of the processor. While blending, add lemon juice, white wine, and olive oil. Remember, you can always add, but taking away is not so easy.
Mix in the pesto sauce with your favorite pasta and serve (or you can add a little more to make it an extra filing meal. I added “Chicken” cutlets and mushrooms in lemon white wine sauce to the pasta for some extra protein) Recipe to follow....
Kale Pecan Pesto
Ingredients:
1 bunch of roughly chopped curly kale (steamed)
½ cup coarsely chopped pecans
5-7 cloves of garlic
1 large lemon
½ cup white wine
Salt and pepper to taste
½ tsp Chili powder (optional)
½ cup shredded parmesan cheese (or less- up to you)
1 cup olive oil
Preheat oven to 425 degrees. Wrap garlic and pecans in foil and place in oven for approximately 20 minutes.
In a food processor, combine the steamed kale, pecans and garlic, pulse until well blended. Using a spatula, scoop off the sides of the processor to make sure all is well combined. Add parmesan, salt, pepper, chili powder and lemon zest and again pulse until mixed. Again, remove any stray pesto mixture from the sides of the processor. While blending, add lemon juice, white wine, and olive oil. Remember, you can always add, but taking away is not so easy.
Mix in the pesto sauce with your favorite pasta and serve (or you can add a little more to make it an extra filing meal. I added “Chicken” cutlets and mushrooms in lemon white wine sauce to the pasta for some extra protein) Recipe to follow....
Labels:
Kale Pecan pesto,
pasta,
pasta sauce,
pesto,
recipe,
vegetarian
Sunday, May 6, 2012
Gnocchi!!!! (Recipe- vegan)
I love gnocchi. The little lead bullets of goodness are the perfect vehicle for any type of sauce. Forever did I think these dumplings were a difficult and mysterious creation from the Italian god of perfection, probably together with Bacchus (because wine shouldn't be left out of a good meal). Anyway, back to my discovery... I decided to try to make these delightful creations, only to find out that they are SUPER easy!! So, here it goes...
Ingredients:
1 pound Yukon gold potatoes
3/4 cup of flour (or enough flour for the dough not to be sticky)
salt to taste
Process:
Bake the potatoes in the oven until soft- approximately 1 hour or so, depending on their size. Once baked allow to cool.
Remove the skin. In a large bowl, using either a ricer or a fork, mash them up well. Add flour and salt; mix together. Keep adding flour until the dough doesn't feel sticky. Let rest for approximately 5-10 minutes.
During this period of time you can get the water pot started (like you would for any store purchased pasta)
Take a handful of the dough and begin rolling it between your hands to form a log. Then, on a floured cutting board, continue rolling until the dough roll is about the size of your thumb (unless you have really large thumbs, then roll it a little thinner.) Once rolled, cut the dough every inch. Make an imprint in each piece and then roll slightly to create the barrel look. Place on the side (not touching) Do this until all the dough is formed into the individual pieces.
Once the water in your pot is boiling, place your gnocchi into the salted water. Allow to cook until the piece begins to float (approximately 3-4 minutes). Remove from water, place in bowl with favorite sauce and mangia! This recipe feeds about 3-4 people.
Labels:
gnocchi,
pasta,
recipe,
vegan,
vegetarian
Banana Blueberry Bread (Recipe)
Standing in my kitchen reprimanding myself for allowing another two bananas to go uneaten before they became "baking bananas", I noticed the blueberries and I had yet to touch as well. These were still in their prime, but I knew if I ignored them long enough they too would not be saved from the compost pile. Since I am always excited to buy fruits and vegetables, but often neglect them once they arrive in my refrigerator and become just scenery to my exhausted after work or early morning bleary just searching for coffee eye, I felt that what better use then to add the blueberries to the banana bread!
Here's the down and dirty for making the bread:
Ingredients:
2 medium sized well ripened bananas
4 oz softened butter (1 stick)
1 cup sugar
2 eggs
2 teaspoons vanilla extract or paste
2 teaspoons Amaretto (optional)
2 cups flour
1 1/2 teaspoons baking powder
1 teaspoon baking soda
1/2 teaspoon salt
1 cup of fresh blueberries
Process:
Prepare loaf pan- oil (butter) pan then flour it. Preheat the oven to 350 degrees.
Mix and/or sift together in a medium sized bowl the dry ingredients, except the sugar (flour, baking powder, baking soda and salt). Put aside for the moment.
In a large bowl cream together the sugar and butter. Once well combined, add the banana (you can mash it beforehand or if ripe enough, just throw it in- it will mix up just fine), eggs, Amaretto and vanilla. Mix well- I use a hand mixer, but it isn't necessary, just faster.
Stir the dry ingredients into the banana mixture. Mix until it is combined, but don't over do it. Then fold in the blueberries. Pour batter into prepared pan and place in oven. Cook for approximately 1 hour, or until the center is cooked (toothpick test method).
Enjoy!
Saturday, April 14, 2012
Red Velvet Cupcakes (Recipe)
Ingredients:
Cake:
2 1/2 cups flour
1/2 cup cocoa powder (Droste)
1/2 teaspoon salt
1 teaspoon baking soda
1 cup butter (2 sticks) softened to room temperature
2 cups sugar
4 eggs
1 cup Greek yogurt
1/2 cup milk
1 ounce natural red food coloring
2 teaspoons vanilla extract
Icing:
4 cups of powdered sugar
8 ounces of softened cream cheese
1/4 cup softened butter
2-3 tablespoons of milk, yogurt or sour cream (each will give a slightly different taste to the icing)
2 teaspoons vanilla extract
Directions:
preheat oven to 350 degrees
Mix together sifted flour, cocoa powder, salt and baking soda in a medium sized bowl.
In a separate large bowl, cream (electric mixer works well) together butter and sugar. Add one egg at a time mixing thoroughly. Then add yogurt, vanilla, and milk- continue mixing. Add red food coloring. Slowly mix in the cocoa mixture until just blended together- do not over mix. The batter will be quite thick.
Spoon batter into lined cupcake tins, approximately 2/3 full. Bake for 20 minutes, or until toothpick comes out clean. Cool in tins for 5 or so minutes then transfer cupcakes to wire rack to cool completely.
While cooling, prepare icing.
In a large bowl, beat together until fluffy the cream cheese, butter, milk (or yogurt or sour cream) and vanilla. Then slowly add the powdered sugar until blended and smooth.
Place icing into a piping bag or a sandwich bag and cut tip. Pipe onto the cooled cupcakes.
Store cupcakes in a sealed contact in the refrigerator- cream cheese can and does go bad if left out, even with the addition of the sugar. Better safe... This is presuming that they aren't all immediately consumed, which is a possibility.
Enjoy your lovely cupcakes.
Labels:
dessert,
recipe,
red velvet cupcakes
Monday, January 2, 2012
Gnawing at the Walls- Gingerbread House (recipe)
Continuing my immersion into all things gingerbread, I made my very first gingerbread house. Just like any other house (I would imagine) it takes proper measurements, planning, patience and lots and lots of mortar, or in this case, icing.
Be prepared. Have a serrated knife, a form or a really good eye for measurements and some free time. You can be as creative as your mind, budget and supplies allow. Since I have access to a couple candy stores, I was in good company.
Have all your basics ready to go (e.g. your base for the house, your royal icing, your gingerbread dough, and things to brace your house while building and allowing the icing to dry). If you are ready, it will be less frustrating and your roof will more likely than not remain attached.
What you will need (mind you, this IS an art project, my suggestions are just that, suggestions).
1) Board for the house. I went to my local craft store and found a foam poster board that I cut in half and covered with aluminum wrap. This way, I can use it again once this one has been consumed.
2) Royal Icing:
Ingredients:
3 tablespoons meringue powder (you can find it at your craft store or specialty food store)
4 cups powdered sugar
6 tablespoons warm water
piping bag(s) or plastic sandwich bags with a sealing device (e.g Ziploc)
food coloring for coloring icing
Preparation:
In a large bowl combine all ingredients and beat using a handheld mixer until the icing forms peaks. approximately 10 minutes.
DO NOT LEAVE UNCOVERED ONCE READY. It is your mortar, it will solidify and become useless if you leave it out. Put it into your uncut piping bag and seal it or place it into a airtight container.
Gingerbread Dough Preparation- dough can be made the day before:
Ingredients:
6 cups flour
1/2 teaspoon baking powder
1 teaspoon baking soda
1 cup butter (unsalted), softened
1 cup brown sugar
4 teaspoons ground ginger
4 teaspoons cinnamon
1 1/2 teaspoons ground cloves
1 teaspoon black pepper
1 1/2 teaspoons salt
1 1/2 dark unsulfured molasses
2 eggs
Preparation:
Sift together the flour, baking soda and powder in a bowl, something large enough to hold 6 cups of flour. (the "Dry Ingredients")
In a separate large bowl, combine the butter and brown sugar. Once well creamed, add all the spices (including the salt and pepper). Beat in the eggs and molasses. (the "Wet Ingredients")
Slowly add the Dry Ingredients to the Wet Ingredients. Mix until well combined.
Break the dough up into approximately 1/3s, wrap each separately in plastic wrap pressing it flat and round (for easier rolling later) and refrigerate for at least 1 hour (or overnight).
When the dough (and you) are ready, preheat the oven to 350 degrees Fahrenheit.
Only take out the 1/3 you are planning on working with. That way the other pieces stay solid. Roll out the dough on a well flour dusted space. Have your forms ready to go. If the dough is sticky, put it back in the refrigerator.
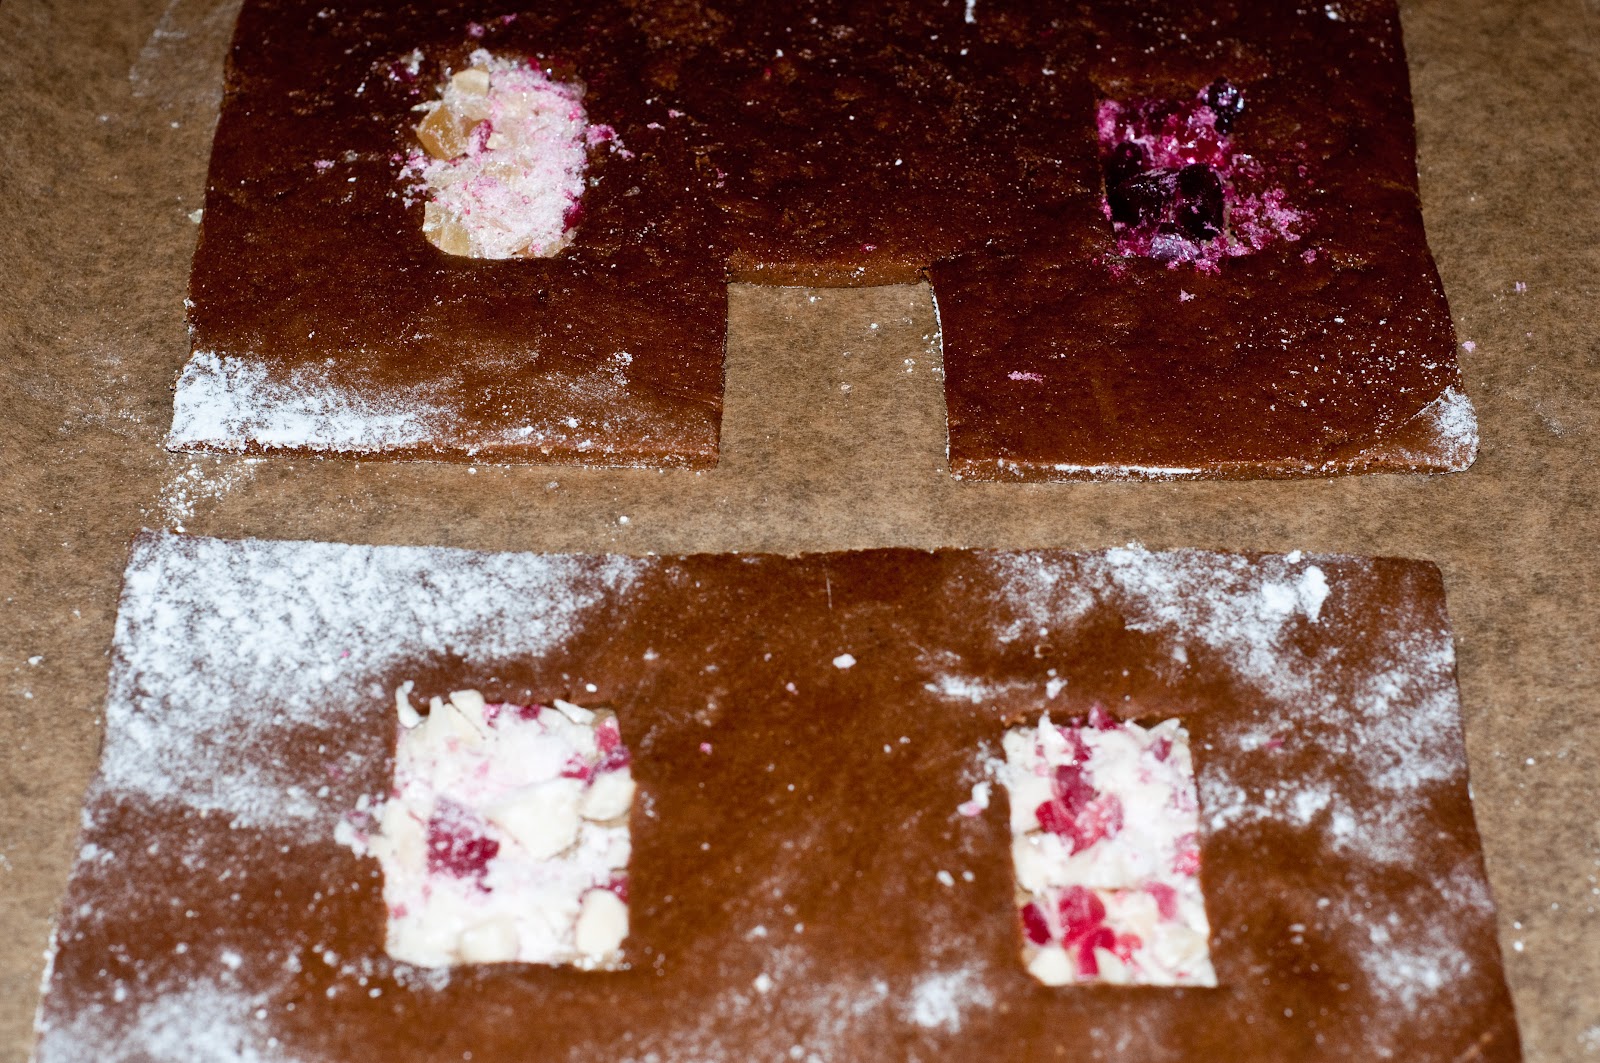
Roll the dough out to approximately 1/4 thickness. Place your forms on the dough and carefully cut out your shapes. Use a sharp knife- it just cuts cleanly. Cut your windows and doors out at this point. Be as creative as you want. Place each cut out on your parchment covered cookie sheets. Chill on the cookie sheets for 10 minutes or so, if you can. Not necessary, just helpful.
If you want to get fancy, you can crush up hard candies and place them in your window openings to get the stained glass affect. Any color will do. I used suckers, but any hard candy will do. This is great if you are planning on lighting your house (or adding the battery operated candles)
Bake for approximately 15 minutes, or until firm.
Remove from cookie sheet, once slightly cool enough to touch, use your cutting board and serrated knife to clean up the edges. Saw at the pieces gently, you don't want to break it into pieces. It will make it significantly easier to build your house with clean lines. Then place on cooling rack and allow to completely cool.
It will take a couple rounds of cutting and baking to make your entire house.
Construction of your edible home:
Have your icing ready, cut a SMALL hole in the piping bag. Small is better. Place your decorating board on a flat surface and have all of your home pieces ready to go in the same location, along with supporting props (e.g. cups, books, jars, whatever will help hold the walls straight while the icing is drying.
Generously ice the bottom of your first wall. Place it firmly on the board. Then along the base of the board and the first piece, pipe more icing. Have your supporting prop next to the first side for this.
Next, ice the bottom and corresponding side of the second piece of the house to form a 90 degree angle. Press the second piece firmly, yet gently to adhere to your first piece. again, have your prop ready.
Keep adding your sides like this. Wait until your walls are fully secured and dried before you add the roof. You don't want it to collapse after all that hard work. It will take between 4 to 8 hours depending on the humidity to become secure enough to add the roof.
Once dry, you can begin decorating the roof of the house and its surrounding area. I wanted a wintery scene so I added some further decorations.
Candies and such used:
ice cream cone (tree)
white chocolate covered malted balls,
hard candies, blue for creek
vegan marshmallows, snow bank
graham cracker sticks for wood pile
candy covered chocolate rocks for walkway
yogurt covered pretzel stars and balls for house decoration
marzipan for dog and cat
cinnamon toast crunch cereal for the thatched roof
shredded coconut for snow
to add the snow and make it stick, you can thin out some of the icing by placing a teaspoon of icing in a small container and adding water until it is quite thin. Then, with a basting brush, paint with the icing where you want the "snow" to be.
It is a great project and lots of fun. Some great sites where I found some ideas, tips, recipes, and most important forms, are found here, and here, and here and here.
Friday, December 30, 2011
Gingerbread Brownies (recipe)
To get into the season, I decided to make gingerbread inspired desserts. My first item was a gingerbread brownie recipe that I came across. It is quite easy and not a whole lot of mess. I should also mention it is more of a cake brownie than a fudge brownie.
Ingredients:
1 3/4 cups flour
3/4 cup sugar
3/4 cup brown sugar
1/4 cup cocoa powder (Droste Cocoa is my favorite)
1 to 1 1/2 tps ground ginger (depending on how sharp you prefer it)
1 1/2 tsp cinnamon
1 tsp salt
1/4 tsp ground clove
12 tbsp butter, unsalted (melted and cooled)
1/2 cups molasses
1/4 cups milk
1 egg
1 1/2 tps baking soda and 1/4 cup of boiling water
8 ounces semisweet chocolate chips
Directions:
Butter (or oil) and flour a 9 x13 pan and preheat oven to 325 degrees.
In a large bowl, combine the flour, both sugars, salt, cocoa powder, and spices. Create a well in the center of the dry ingredients.
In a separate bowl, mix together the butter, molasses, milk and egg. Once well mixed, add this to the dry ingredients. Combine until all the dry is mixed in. Then add the boiling water/baking soda mixture to the batter. Again, mix until well combined. Add the chocolate chips.
Pour batter into the prepared pan and bake for approximately 45 minutes, or until your toothpick inserted in the center comes out clean.
Cool and then cut into pieces.
(the original recipe can be found here, but I tweaked it a bit to reduce the ginger and egg content).
Wednesday, September 21, 2011
Peach Vanilla Preserves
So, the peaches. Peaches as far as the eyes can see.
What to do with that many?
Well, one of the things that I decided to try was peach preserves. I have made strawberry freezer jam, but never preserves and never with peaches. Here we go!
Ingredients:
5 pounds of ripe peaches (I put them into a container and weighed them on the bathroom scale- I have no idea how many peaches would total 5 pounds and I do not have a kitchen scale).
3 1/2 cups of granulated sugar
1/4 cup of lemon juice (fresh)
1 1/2 teaspoons vanilla
Directions:
Wash peaches and then cut an X in the bottom of each peach.
Place peaches in boiling water for approximately 45 seconds, then immediately place them in an ice bath to stop them from cooking.
The skins will pull right off (if they are ripe). Remove the skin, pit and cut the peaches into 1/8ths, or so. Combine the peaches, sugar and lemon. Cover the container and place in refrigerator overnight.
In a large sauce pan or stock pot (the stock pot is usually a better choice since sugar can and does boil over), bring the sugar-peach mixture to a simmer, skimming the foam from the top. Continue to stir occasionally for the next 20 minutes or so. Remove the pot from heat and stir in the vanilla.
Fill the prepped containers with the preserves leaving approximately 1/8 inch of space from the top. Place the seal and tighten the rim, but do not over tighten. Wipe down the rims and seals.
Place the sealed cans in the hot water (BUT NOT BOILING- you don't want to break the cans) making sure that they do not touch or tip over. The containers need to be immersed in the water (check that the containers are covered with about 2 inches water). Cover the pot with a lid and bring the water to a boil. Once boiling, process the containers for 5 minutes.
Remove the containers from the boiling water and place on wire rack to cool for 24 hours. Once cool, check the container seal by pressing on it to make certain there is no give. If it pops back up, it didn't seal properly and you should place it in the refrigerator and consume it with in a month. The other properly processed containers can be shelved for up to a year in a cool dark place.
I had some left over preserves that didn't fit in my larger jars, so I reserved that for a little taste test. I found the preserves tasty and I hope you do as well!
Next up canned peaches.
Saturday, August 13, 2011
Pancakes Worth Making (Recipe)
This recipe is first and foremost for my cousin. I have been trying to share this each and every time I see her, but we tend to get sidetracked on other matters and so I have decided to share it with everyone. Here it goes...
2 tablespoons of butter, melted
1 cup of flour11/2 teaspoons baking powder
2 teaspoons sugar
1/2 teaspoon salt
1 cup of milk
1 eggfruit of choice (optional)
Ingredients for berry sauce:
1 cup fresh strawberries, cut
1 cup fresh raspberries
1 teaspoon lemon juice
2 tablespoons sugar
*(you can add 1 teaspoon of cornstarch, in a 2 tablespoons of water, if you want the sauce to thicken)
Putting it together (sauce):
Some people prefer maple syrup. If I am making fruit pancakes, I would rather have a nice fruit sauce to go over them. In a small heated sauce pan place all the sauce ingredients together, except the cornstarch, if you are using it. Keep stirring so as to avoid anything sticking on the bottom of the pan. Once the mixture starts looking like a sauce, about 10 minutes, you can add the water/cornstarch mixture to the sauce. Keep mixing for another 5 minutes or so. Remove from heat. This sauce can be made before hand and placed in the refrigerator for later. Great on ice cream too.
Putting it together (pancakes):
sift all the dry ingredients (flour,sugar, salt and baking powder) together, put aside.
In a separate bowl, whisk the milk and egg- then add the melted butter. Once well mixed, stir in the dry ingredient mixture. Set aside and let rest for 5 minutes. While waiting, pre-heat your griddle or pan. Add butter or margarine to pan.
Place a small ladle full of batter in pan. I prefer smaller pancakes so I can cook three at a time. Add fruit to the exposed uncooked batter (in pan). Adding the fruit this way allows everyone to have the type of pancakes they prefer- no need for early morning negotiations. Cook until bubbles form on expose side and then flip.
Plate and serve! The sauce compliments the berried pancakes nicely.
Labels:
pancakes,
recipe,
vegetarian
Saturday, August 6, 2011
Waffling (suiker wafel recipe)
I have a sweet tooth, a serious sweet tooth, and am happy to seek out the best of the best when it comes to sweets- tasting as I go, nonetheless. And, to date, these are my favorite waffles. Suiker wafels are waffles that have beautiful pieces of sugar cooked into them- some remain whole others are nicely caramelized when cooked.
Recipe:
Take your butter out well beforehand. It needs to be soft. If it isn't soft wait to make the waffles. Do not try to rush the softness of the butter by placing it into the microwave. It causes it to become liquid, not soft. You do not want liquid butter for this recipe. You want soft. Again, soft butter. Butter can survive being out of the refrigerator for a while. If I am going to make waffles, I have been known to take the butter out the night before so that in the morning it is ready to go before I am. If you want to know more about the great butter debate, check out some of the comments here.
Warm the water to about 100 degrees (or to where it feels warm to the touch- I am a knuckle temp. tester, I must confess. I have never actually checked the temperature of the milk with anything other than my knuckle and it has yet to kill the yeast.)
Sprinkle the yeast into the water and add about a teaspoon of sugar and a teaspoon of four to feed the yeast. Set the mixture aside for 5-10 minutes to allow it to proof. If you want to know more about proofing yeast, go here.
In a large bowl (large enough to allow dough to rise in) sift your flour. Although I do this sometimes, I do not do it all the time and it still turns out fine. Make a well and add your egg, yeast concoction and warm milk. Mix well with a spoon, preferably a wooden spoon. Cover with a towel and leave to rise to about double/tripled in size.
In a second bowl (medium sized), mix butter, 1 teaspoon of sugar, pinch of salt, vanilla, baking powder, and 7 tablespoons of flour together. Once mixed, throw in the pearl sugar and mix again. It seems to work better that way.
At this point get your waffle iron started. It needs to be hot- you don't want mushy waffles. That is just sad after the work you have already put in.
Once the rising dough is ready, place the contents of the second bowl into the first. The second bowl dough will deflate the rising dough a bit. This is a picture of what it will look like.
![]()
In the end you are left with about 8-10 beautifully crisp waffles, that is unless you ate them all before you finished cooking. These are dense awesome waffles. There is no need to add syrup or anything else to them. Easy to just pick up and eat. No need for plates or other silly nonsense. Enjoy!
The recipe I use is a bit time consuming, but worth the effort. It is difficult not to eat all of them by yourself while cooking. I suggest having at least one other person around to protect you from yourself and your taste buds.
Ingredients:
5 3/4 teaspoons of dry yeast
9 tablespoons of butter, room temperature
1/4 cup milk, warmed
1 Egg, beaten
1 cup and 7 tablespoon of flour
2 tablespoons of granulated sugar
1 teaspoon of vanilla extract
1/4 teaspoon of baking powder
1/4 cup of water, warmed
pinch salt
1/2 cup Pearl sugar (or sugar cubes crushed up)
This is the sugar I use. I buy it when I go to Belgium because it is the most perfect waffle sugar I have found. I have used others, but I like this the best. There are some specialty stores that sell it too. You can search for pearl sugar, hail sugar, or nib sugar- these should get you to a good sugar product (I do not recommend using the Lars brand sugar for these waffles- the pieces are not large enough to give the authentic feel of the waffles). Here are a couple sites that have the sugar: http://www.belgianpearlsugar.com/, http://chefshop.com/HAIL-SUGAR-PEARL-SUGAR-P5944.aspx. I have never purchased it from these sites, but the sugar looks right in the pics.
Recipe:
Take your butter out well beforehand. It needs to be soft. If it isn't soft wait to make the waffles. Do not try to rush the softness of the butter by placing it into the microwave. It causes it to become liquid, not soft. You do not want liquid butter for this recipe. You want soft. Again, soft butter. Butter can survive being out of the refrigerator for a while. If I am going to make waffles, I have been known to take the butter out the night before so that in the morning it is ready to go before I am. If you want to know more about the great butter debate, check out some of the comments here.
Warm the water to about 100 degrees (or to where it feels warm to the touch- I am a knuckle temp. tester, I must confess. I have never actually checked the temperature of the milk with anything other than my knuckle and it has yet to kill the yeast.)
Sprinkle the yeast into the water and add about a teaspoon of sugar and a teaspoon of four to feed the yeast. Set the mixture aside for 5-10 minutes to allow it to proof. If you want to know more about proofing yeast, go here.
In a large bowl (large enough to allow dough to rise in) sift your flour. Although I do this sometimes, I do not do it all the time and it still turns out fine. Make a well and add your egg, yeast concoction and warm milk. Mix well with a spoon, preferably a wooden spoon. Cover with a towel and leave to rise to about double/tripled in size.
In a second bowl (medium sized), mix butter, 1 teaspoon of sugar, pinch of salt, vanilla, baking powder, and 7 tablespoons of flour together. Once mixed, throw in the pearl sugar and mix again. It seems to work better that way.
At this point get your waffle iron started. It needs to be hot- you don't want mushy waffles. That is just sad after the work you have already put in.
Once the rising dough is ready, place the contents of the second bowl into the first. The second bowl dough will deflate the rising dough a bit. This is a picture of what it will look like.
Mix the two doughs together with your hands. It will stick. It's supposed to do that. Try to get as much back into the bowl as possible rather than on your apron or in your hair.
Once well mixed. I use a silicone spatula and a butter knife to make the 8-10 balls of dough ,which I flour and allow to stand on a cookie sheet for about 10 minutes.
Then, in your heated waffle iron add the dough balls and allow them to cook. Because the waffles were floured, I do not usually use any butter or oil in the waffle iron, however, you can if necessary. Cook until golden brown then place on cooling rack- or eat warm.
In the end you are left with about 8-10 beautifully crisp waffles, that is unless you ate them all before you finished cooking. These are dense awesome waffles. There is no need to add syrup or anything else to them. Easy to just pick up and eat. No need for plates or other silly nonsense. Enjoy!
Labels:
gaufre,
liege,
recipe,
sugar waffles,
suiker wafel,
vegetarian,
waffles
Sunday, July 31, 2011
Asparagus Cilantro Soup (Recipe)
Another throw together recipe here. I had some aspargus that I needed to use up and what better way than in a soup! The preparation for this recipe is fairly short and easy- I made it on a "school night."
Ingredients:
1 bunch of asparagus cut in pieces, separate out the spears
1/2 Spanish onion, diced
4 cloves of garlic, diced
1/2 of lemon (juiced)
1 carrot, chopped
1 potato, diced
4 cups vegetable broth
small hand full cilantro, chopped (to taste)
grapeseed oil (or other veg oil)
just a drop (or so) of a white wine
1/4 to 1/2 cup of almond milk
bay leaf
adobo seasoning
hot chili pepper powder
salt
pepper
Directions:
In a heated stock pot, drizzle oil thrown in onion, garlic mix until translucent. Throw in bay leaf potato and carrot. allow to cook for 5-10 minutes while moving ingredients so as not to burn. Then add vegetable broth and asparagus. Allow to simmer for 30-50 minutes, stirring periodically. During that time feel free to add spices to taste.

At this point, remove from the heat and, using your handheld blender, blend the soup well. Add almond milk, lemon juice and wine. Place back on heat and allow to simmer another 10 or so minutes. Add the asparagus spears previously placed a side and cilantro. Cook soup another 10 minutes.
The soup works well with a sprinkle of chihuahua cheese.
Enjoy!
Ingredients:
1 bunch of asparagus cut in pieces, separate out the spears
1/2 Spanish onion, diced
4 cloves of garlic, diced
1/2 of lemon (juiced)
1 carrot, chopped
1 potato, diced
4 cups vegetable broth
small hand full cilantro, chopped (to taste)
grapeseed oil (or other veg oil)
just a drop (or so) of a white wine
1/4 to 1/2 cup of almond milk
bay leaf
adobo seasoning
hot chili pepper powder
salt
pepper
Directions:
In a heated stock pot, drizzle oil thrown in onion, garlic mix until translucent. Throw in bay leaf potato and carrot. allow to cook for 5-10 minutes while moving ingredients so as not to burn. Then add vegetable broth and asparagus. Allow to simmer for 30-50 minutes, stirring periodically. During that time feel free to add spices to taste.

At this point, remove from the heat and, using your handheld blender, blend the soup well. Add almond milk, lemon juice and wine. Place back on heat and allow to simmer another 10 or so minutes. Add the asparagus spears previously placed a side and cilantro. Cook soup another 10 minutes.
The soup works well with a sprinkle of chihuahua cheese.
Enjoy!
Labels:
asparagus soup,
recipe,
soup,
vegan,
vegetarian
Friday, July 29, 2011
Open-faced Quesadilla Breakfast Recipe
Every now and again, bored from the run of the mill eggs, potatoes and toast breakfasts that normally suffice, I try to get a little creative. Last weekend was one of those times. I had some bits of veggies and such just waiting for a creative spark. Here's what I came up with...
Ingredients:
Open-faced Quesadilla breakfast:
2 potatoes (cubed and boiled)
3-6 eggs
1/2 of a red pepper, diced
1/2 of a poblano pepper, diced
1/2 red onion, diced
fist full of corn
1 can of refried black beans
1/2 jalapeno pepper, diced
3 garlic cloves
Soyrizo (or if you are a meat eater, chorizo, a Spanish sausage)
corn tortillas
approx. 1 1/2 cups Chihuahua cheese, grated
approx. 1 1/2 cups Cheddar cheese, grated
Mexican seasoning (chili pepper, paprika, cumin, oregano, garlic powder)
salt
pepper
Salsa:
tomatoes
red onion
garlic
jalapeno pepper
cilantro
Mexican seasoning
adobo seasoning
salt and pepper
Directions:
In a pan, using a little oil (your choice, maybe grapeseed) saute the onions and the garlic until translucent. Add the peppers (including the jalapeno) and potatoes to the pan making sure to stir. Add seasoning. Continue stirring. Add corn and Soyrizo.
On a cookie sheet, place several tortillas well spaced. This recipe should make about 4 well covered tortillas. Spread the refried black beans on to the tortillas. Then, dish out, evenly, the Soyrizo/potato mixture on each tortilla. Sprinkle the Chihuahua/cheddar cheese mixture on top of the Soyrizo/potato mixture. Bake in a preheated oven at 400 degrees for about 10 minutes or until the cheese has melted.
While the tortillas are baking, prepare the eggs. I tend to go with scrambled (adding a little salt and pepper) because the are easiest, but this would work well with a sunnyside up egg as well. If you are doing sunnyside up then you will only need 4 eggs- one per each tortilla. Also, I reuse the pan that I just cooked the Soyrizo/potato mixture in. It picks up some of the spices left in the pan.
Once the cheese has melted, remove from oven. Plate the tortilla. Add the eggs on top of the Soyrizo/potato mixture and place a little tomato salsa on the side. If you have avocado, you can add a little of that as well.
...and voila! A nice twist on a regular breakfast.
Sunday, June 12, 2011
Saag Aloo Soup (Curried Potato and Spinach Soup) Recipe
June has been strange thus far- highs in the high 90s and lows in the low 50s, sometimes within the same day. For me, the chill in my bones on a gray day can only be cured by a good soup. So, yesterday, to ease my chilled bones and summer spirit, I threw together a nice curried potato and spinach soup.
Ingredients (Vegetarian or Vegan):
4 golden potatoes
1 large leek
2 tablespoons of butter or margarine
2 cups vegetable broth
2 cups water
1/2 cup milk or almond milk
4 cups chopped fresh spinach
1 teaspoon hot curry powder
2 teaspoons mild curry powder
1 dash garam masala, a nice addition, but not necessary
salt and pepper to taste
Cube the potatoes leaving the skin. Boil until soft and drain well. While the potatoes are boiling, prepare the leek by removing the fanned stalk and the roots- use only the white and light green part of the stalk. Cut the leek in half, lengthwise. Wash thoroughly- leeks tend to get dirt in between their layers so make sure to clean them well- grit, although interesting in texture, does not necessarily belong in a "warm your bones" kind of soup. Once clean, thinly slice the leek halves.
In an evenly heated stock pot, toss in your butter/margarine allowing it to melt then throw in your leek and cooked potatoes. Saute' until the leek is translucent, but keep any eye on it and mix every so often- you don't want the leek to burn or attach to the bottom of your pot.
Before adding the stock, mix in the curry powders and garam masala. Once the spices are well distributed, add 2 cups of vegetable stock and 2 cups of water. Let simmer for approximately 30 minutes- periodically stirring the pot.
While the soup is simmering. chop the spinach. I grab a handful and slice it into ribbons, then make a mound of what I just cut and chop it one more time for good measure. Set the spinach aside.
After the 30 minutes or so is up, using a hand blender, puree the potato/leek mixture in the stock pot until smooth. Once smooth, mix in the 1/2 cup of milk and fold in the chopped spinach. Add salt and pepper to taste. Allow to simmer for another 10 minutes or so.
The soup can be served alone or with rice or naan.
Enjoy!
Sunday, May 1, 2011
Roasted Beet Hummus Recipe
So... last year when visiting family in Belgium, I was introduced to beet hummus. Although no recipe was provided, I decided to see if I could remake this lovely pink hummus. Below is my concoction. I hope those of you who try it let me know if it works for you.
Ingredients:
1 can chickpeas (a/k/a garbanzo beans)
1/3 cup tahini (add it if you want it- if you don't, skip it)
Juice of 1 lemon (approx 1/4 cup)
4 roasted garlic cloves
1 medium sized beet
cayenne pepper to taste
salt to taste
garlic powder (if the 4 roasted cloves weren't enough)
Preparation:
Peel and then roast beet with garlic in oven- 45 minutes to an hour depending on beet size. After roasting, place chickpeas, tahini, lemon juice, olive oil, garlic in food processor and mix until smooth. Throw in beet (diced) and blend until the consistency matches your preference. Remove mixture from food processor and add salt, cayenne and garlic powder to taste.
Serve with tortilla chips or pita bread. Enjoy!
Ingredients:
1 can chickpeas (a/k/a garbanzo beans)
1/3 cup tahini (add it if you want it- if you don't, skip it)
Juice of 1 lemon (approx 1/4 cup)
4 roasted garlic cloves
1 medium sized beet
cayenne pepper to taste
salt to taste
garlic powder (if the 4 roasted cloves weren't enough)
Preparation:
Peel and then roast beet with garlic in oven- 45 minutes to an hour depending on beet size. After roasting, place chickpeas, tahini, lemon juice, olive oil, garlic in food processor and mix until smooth. Throw in beet (diced) and blend until the consistency matches your preference. Remove mixture from food processor and add salt, cayenne and garlic powder to taste.
Serve with tortilla chips or pita bread. Enjoy!
Labels:
beet,
hummus,
recipe,
roasted beet hummus,
vegetarian
Tuesday, January 4, 2011
The Christmas (Veg) Dinner, Part I
Although fleeing to somewhere warmer where I could hide until the holidays passed seemed like a brilliant idea, I stayed home this year and hosted Christmas dinner. Cooking for my family can be a bit of a challenge. My father has a more classic palate, while my mother is cautiously adventurous when it comes to food; then there is my brother and his girlfriend- if meat is not attached to whatever the meal is, it is cause to fret and wonder what on earth I may be feeding them. This year, with my Christmas dinner debut, I believe I successfully satisfied my mélange of guests.
To begin, I served a simple mixed baby greens salad with a balsamic dressing, classic and simple, but still able to hold its own. Next, for my dad, baked ziti. Because I believe a little heat can add another dimension to any meal, my pasta sauce includes chilies- just enough to give a bite, let you know they are there and warm your blood in these cold, dark months. Simple meals, but good, stick to your bones type stuff. Where I got adventurous was the other meal. Yes, I served two separate meals at my dinner-could it be any other way?
The second meal included Portobello Wellingtons with Madeira sauce, mashed potatoes with leeks and a touch of nutmeg and lemon haricot vert with almond slices. The Portobello Wellingtons with Madeira sauce are not for the faint of heart- these gems are labor and time intensive- without the holiday dinner debut looming over me, I don’t know if I would have attempted these. I wanted to wow my guests and these did it.
Knowing what was ahead of me, I paced myself. I began my pasta sauce the night before.
Pasta Sauce:
1 bulb of garlic, diced
1 large onion, diced
2 large cans peeled tomatoes
1 can tomato sauce
6 fresh Roma tomatoes, diced
Red wine
Fresh basil
Italian herb mixture
Salt
Black Pepper
Hot dried chilies
3-4 bay leaves
Olive oil
Sauté onion in 2-3 tbs olive oil until transparent in a thick bottomed stock pot, toss in the diced garlic. Once both the garlic and the onions are sautéed, add the fresh diced tomatoes and allow those to cook for several minutes before stirring in the 2 large cans of peeled tomatoes, the can of sauce and bay leaves. Pour in wine (approximately 1 cup or to taste). Let cook for 10 minutes stirring occasionally to avoid burning the sauce.
At this point, add basil, salt, pepper, hot chilies and the Italian herb mixture, all to taste. A good rule of thumb is to not over do it with the herbs and such- you can always add more as you go, but removal is almost impossible. Allow to simmer for at least an hour, stirring periodically.
After I remove the bay leaves, I puree my sauce with an immersion hand blender. It balances out the flavors and gives a nice texture to the sauce. Once finished blending, place the pot back on the flame and allow the sauce to simmer another 30 minutes or longer depending on desired thickness. Knowing I am adding this to pasta that will end up in the oven, I will make the sauce a little thinner because the oven will cause its own evaporation and thicken the sauce up a bit.
Once the sauce is “done” you can either serve it with pasta, let it cool and freeze it for later, or let it cool and place it in the refrigerator for use within the week. As a general rule, the sauce is always better the second day and, as with this batch, I allowed it to cool and then placed in the refrigerator for the following day’s final preparations for the baked ziti- after, of course, giving the sauce a trial run with a little pasta, along with a good red wine, such as Jazz.
I left the remaining, more daunting Portobello Wellington recipe for the coming day. To be continued…
To begin, I served a simple mixed baby greens salad with a balsamic dressing, classic and simple, but still able to hold its own. Next, for my dad, baked ziti. Because I believe a little heat can add another dimension to any meal, my pasta sauce includes chilies- just enough to give a bite, let you know they are there and warm your blood in these cold, dark months. Simple meals, but good, stick to your bones type stuff. Where I got adventurous was the other meal. Yes, I served two separate meals at my dinner-could it be any other way?
The second meal included Portobello Wellingtons with Madeira sauce, mashed potatoes with leeks and a touch of nutmeg and lemon haricot vert with almond slices. The Portobello Wellingtons with Madeira sauce are not for the faint of heart- these gems are labor and time intensive- without the holiday dinner debut looming over me, I don’t know if I would have attempted these. I wanted to wow my guests and these did it.
Knowing what was ahead of me, I paced myself. I began my pasta sauce the night before.
Pasta Sauce:
1 bulb of garlic, diced
1 large onion, diced
2 large cans peeled tomatoes
1 can tomato sauce
6 fresh Roma tomatoes, diced
Red wine
Fresh basil
Italian herb mixture
Salt
Black Pepper
Hot dried chilies
3-4 bay leaves
Olive oil
Sauté onion in 2-3 tbs olive oil until transparent in a thick bottomed stock pot, toss in the diced garlic. Once both the garlic and the onions are sautéed, add the fresh diced tomatoes and allow those to cook for several minutes before stirring in the 2 large cans of peeled tomatoes, the can of sauce and bay leaves. Pour in wine (approximately 1 cup or to taste). Let cook for 10 minutes stirring occasionally to avoid burning the sauce.
At this point, add basil, salt, pepper, hot chilies and the Italian herb mixture, all to taste. A good rule of thumb is to not over do it with the herbs and such- you can always add more as you go, but removal is almost impossible. Allow to simmer for at least an hour, stirring periodically.
After I remove the bay leaves, I puree my sauce with an immersion hand blender. It balances out the flavors and gives a nice texture to the sauce. Once finished blending, place the pot back on the flame and allow the sauce to simmer another 30 minutes or longer depending on desired thickness. Knowing I am adding this to pasta that will end up in the oven, I will make the sauce a little thinner because the oven will cause its own evaporation and thicken the sauce up a bit.
Once the sauce is “done” you can either serve it with pasta, let it cool and freeze it for later, or let it cool and place it in the refrigerator for use within the week. As a general rule, the sauce is always better the second day and, as with this batch, I allowed it to cool and then placed in the refrigerator for the following day’s final preparations for the baked ziti- after, of course, giving the sauce a trial run with a little pasta, along with a good red wine, such as Jazz.
I left the remaining, more daunting Portobello Wellington recipe for the coming day. To be continued…
Labels:
Christmas,
dinner,
holidays,
pasta sauce,
recipe,
vegetarian
Thursday, December 2, 2010
A Little Throw Together Vegetarian Meal (Chicken, in a lemon, white wine, tarragon sauce)
As most of you know, I am not a cook. But as time passes, I am becoming more daring in the kitchen. Cooking is truly a learning experience. I've spent years watching a very good cook, but never doing much by way of assistance with the main meals. Rather, I came in for dessert duty. Slowly I am moving away from just baking and into actual cooking.
Last night I decided to throw together Quorn “chicken” (a meat alternative which is also soy free), in a lemon, white wine, tarragon sauce, sautéed spinach and garlic and roasted rosemary potatoes. I whipped up this little meal sans recipe.
Ingredients:
Chicken, in a lemon, white wine, tarragon sauce
Package of Quorn cutlets (can substitute in actual chicken if you so choose)
5 cloves of garlic (sliced)
3 sprigs of tarragon (whole)
Bay leaf
“No Chicken” or vegetable broth (2 cups)
white wine (approx 1 cup or so)
Salt
Pepper
1 whole lemon (cut in half. One half will be used to cut slices of lemon to place on top of cutlets)
Olive oil
1 tsp butter
1 tsp corn starch
Sauteed Spinach with garlic
1 package of spinach (fresh)
4 cloves of garlic
Olive oil
Roasted Rosemary Potatoes
4 Yukon gold potatoes
2 tablespoons dried rosemary (or 2 fresh sprigs)
1 tsp of dried garlic
Salt and pepper to taste
Olive oil
Pulling the meal together:
Begin with the potatoes. Preheat the oven to 425°. Cut potatoes into cubes (leave skin). In a 9 inch baking dish drizzle oil and then toss in potatoes to coat with oil. Sprinkle garlic, rosemary, salt and pepper. Toss again to cover all pieces and place in the oven for about 45 minutes- making sure to turn them every 15 or so minutes to avoid burning.
While the potatoes are baking, heat deep skillet pan, place olive oil (about 1 tablespoon) and butter. Then sauté the garlic slices. Place the cutlets in pan next (carefully to avoid splatter). Once these are slightly browned, add the (about 1 cup) white wine, broth, tarragon, bay leaf, salt, pepper and lemon juice. Place lemon slices in the sauce. Allow to simmer for about 20 minutes to release the flavors into the sauce. You can cover it to keep in the moisture. Within the last 5 minutes or so, mix in the corn starch to thicken the sauce a bit.
While the chicken and the potatoes are cooking, go ahead and start the spinach. Heat wok (the wok is easiest way to fit all the greens in while the leaves are still firm). Once heated, place about 1-2 tablespoons of olive oil in wok and sauté the garlic. Before the garlic turns brown add the spinach and sauté until the spinach is wilted, but still whole.
At this point you are ready to plate and serve. I would suggest a nice white wine to go with this meal- maybe Evolution (an Oregon wine). It is a heartier wine (e.g. it also can hold up to many meat dishes too). Or, you can always go with a good standby from Trader Joe's.
Bon Appetite!
Last night I decided to throw together Quorn “chicken” (a meat alternative which is also soy free), in a lemon, white wine, tarragon sauce, sautéed spinach and garlic and roasted rosemary potatoes. I whipped up this little meal sans recipe.
Ingredients:
Chicken, in a lemon, white wine, tarragon sauce
Package of Quorn cutlets (can substitute in actual chicken if you so choose)
5 cloves of garlic (sliced)
3 sprigs of tarragon (whole)
Bay leaf
“No Chicken” or vegetable broth (2 cups)
white wine (approx 1 cup or so)
Salt
Pepper
1 whole lemon (cut in half. One half will be used to cut slices of lemon to place on top of cutlets)
Olive oil
1 tsp butter
1 tsp corn starch
Sauteed Spinach with garlic
1 package of spinach (fresh)
4 cloves of garlic
Olive oil
Roasted Rosemary Potatoes
4 Yukon gold potatoes
2 tablespoons dried rosemary (or 2 fresh sprigs)
1 tsp of dried garlic
Salt and pepper to taste
Olive oil
Pulling the meal together:
Begin with the potatoes. Preheat the oven to 425°. Cut potatoes into cubes (leave skin). In a 9 inch baking dish drizzle oil and then toss in potatoes to coat with oil. Sprinkle garlic, rosemary, salt and pepper. Toss again to cover all pieces and place in the oven for about 45 minutes- making sure to turn them every 15 or so minutes to avoid burning.
While the potatoes are baking, heat deep skillet pan, place olive oil (about 1 tablespoon) and butter. Then sauté the garlic slices. Place the cutlets in pan next (carefully to avoid splatter). Once these are slightly browned, add the (about 1 cup) white wine, broth, tarragon, bay leaf, salt, pepper and lemon juice. Place lemon slices in the sauce. Allow to simmer for about 20 minutes to release the flavors into the sauce. You can cover it to keep in the moisture. Within the last 5 minutes or so, mix in the corn starch to thicken the sauce a bit.
While the chicken and the potatoes are cooking, go ahead and start the spinach. Heat wok (the wok is easiest way to fit all the greens in while the leaves are still firm). Once heated, place about 1-2 tablespoons of olive oil in wok and sauté the garlic. Before the garlic turns brown add the spinach and sauté until the spinach is wilted, but still whole.
At this point you are ready to plate and serve. I would suggest a nice white wine to go with this meal- maybe Evolution (an Oregon wine). It is a heartier wine (e.g. it also can hold up to many meat dishes too). Or, you can always go with a good standby from Trader Joe's.
Bon Appetite!
Labels:
cooking,
Quorn,
recipe,
roasted potatoes,
spinach,
vegetarian,
wine
Friday, November 12, 2010
Raspberry & Cream (Creme fraiche) Tart
This little treat goes fast and is easy to make. It has almost a cheesecake feel to it, but isn't as heavy.
I was invited to a potluck Halloween party and couldn't decide what to make so I went with the raspberry cream tart, a recipe I picked up from the Spice House. It was a hit- my cousin gives it 2 thumbs up.
Ingredients:
1 stick butter (softened)
1/2 cup sugar
1/4 cup brown sugar
4 eggs
2 tsp vanilla
1 cup flour
pinch of salt
3/4 creme fraiche
2 cups fresh raspberries (or other berry)
2 tablespoons vanilla sugar
Oven: 350 degrees (preheated)
Beat butter, 1/4 cup sugar, 1/4 cup brown sugar and salt. Then add in 3 eggs and 1 tsp vanilla. Beat together until smooth. Toss in 1 cup of flour and mix until combined. Pour mixture into tart pan making sure to spread it evenly over the entire surface and up the sides of the pan. It is sticky, it is supposed to be. If you don't spread it well, your filling will stick to the tart pan and make it difficult to remove.
Next, whisk together 3/4 cup of the creme fraiche and 1 egg. Mix in 1/4 cup of sugar and the last tsp of vanilla. Once mixed, pour into the tart pan and spread this evenly as well. If you aren't careful, it will spill over the sides and look messy...so be careful.
Once the filling is placed where you want it, begin placing the berries. Remember, the berries will be seen so try to make them look nice- leave the smashed ugly ones for snacking while decorating the tart with the prettier ones. After you have the berries placed where you want them, sprinkle the whole tart with vanilla sugar.
Place in the oven 50-60 minutes- until crust is brown and filling is set. Let cool and then have at it.
I am willing to believe, but I have not yet tried it, that you could probably throw in some unsweetened chocolate with the crust batter creating a chocolate crust, raspberry cream tart... maybe next time...
Labels:
raspberry cream tart,
recipe,
tart
Sunday, September 5, 2010
Vietnamese Spring Rolls in Translation
While teaching English as a Second language, my friend and student Mai, determined that I learn to make something Vietnamese, suggested I make spring rolls. She guaranteed that they were easy to throw together, especially since I would be making a vegetarian version. As with most "cooking" type things, I did not believe her. I tucked away her suggestion and then last weekend, on a whim, I decided to tackle the spring roll.
Ingredients:
dry Rice wrapper (round)
carrots
cucumber
shitake mushrooms
scallions
bean sprouts
rice noodles (thin)
cilantro
really good soy sauce
sesame seed oil
For Dipping:
Spicy peanut sauce
Really good soy sauce
Plum sauce
First, bring a pot of water to boil for the noodles. Do not add the noodles yet.
While waiting for the water to boil, saute the shitake mushrooms with a little soy sauce and sesame oil put that aside to cool.
Once the water is boiling, turn off the heat and add the noodles. keep stirring the noodles until they are soft- once soft drain the noodles and allow them to cool.
Julienne both the cucumber and the carrots.
Fill a large bowl with lukewarm water to rehydrate the dry rice wrappers. Take your first rice wrapper, while holding it, dip it into the bowl until it is soft, but not disintegrated.
Once the wrapper is moist, lay it down to begin adding the filling. I place them on a cutting board to make it easier to move around.
On one end, place some of the noodles, carrots, cucumber, shitake mushrooms, bean sprouts and cilantro. Pull the end of the wrapper where you placed the filling over the filling completely.
Fold in each side of the wrapper to secure the filing and then roll away from you. The wrapper is sticky and will seal itself. Place on the side. Repeat these steps until you reach the number of rolls needed. You can keep the rolls cool in the refrigerator while finishing up the remaining rolls.
Toss cut scallions over the rolls as garnish.
Use one or all of the dipping sauces and enjoy.
Have you ever notice how much fun rolled foods are to eat? There are burritos, tamales, egg rolls, spring rolls, etc. Anything that is self contained and easy clean up is alright by me. I also enjoy the versatility of these rolled foods. The fillings can be replaced, things can be added or removed, all giving a nice twist to the traditional.
Thanks Mai!
Friday, August 13, 2010
Cookie Starts With C- and these start with 3 (Chocolate Chip Cookies)
To celebrate completing another certification exam (fingers and toes crossed that I passed), I whipped up some chocolate chip cookies. Because all my regularly scheduled chocolate chip cookie recipes are packed away somewhere in the depths of a storage unit, I searched for a new recipe. This is what I found. So far I have heard no complaints from my trusty taste testers.
Here is the recipe:
Ingredients
1 cup butter, softened
1 cup white sugar
1 cup packed brown sugar
2 eggs
2 teaspoons vanilla extract
3 cups all-purpose flour
1 teaspoon baking soda
2 teaspoons hot water
1/2 teaspoon salt
2 cups semisweet chocolate chips (or white chocolate chips)
1/2 cup dried cherries (optional)
1 cup chopped walnuts (or macadamia nuts) (optional)
Preheat the over to 350 degrees (I have to turn my oven up to 370 degrees since it has its own temperature agenda regardless of what the knob says.
Cream butter and both sugars until smooth. Add in one egg at a time, continue mixing. Add vanilla- keep mixing. In a measuring cup mix together the baking soda and hot water- allow to dissolve then add to the batter. Mix in your flour (you may want to try reducing the flour to 2 1/2 cups rather than the full 3 cups unless you prefer cakey cookies. I do not, so there you go).
At this stage, I equally divide the dough into 2 separate containers. Since I have a soy sensitivity I have to use soy free chocolate chips. My husband, on the other hand, prefers regular old chocolate chips. Because of this dilemma, 1/2 the dough gets 1 cup regular chocolate chips and then the remaining 1/2 dough gets a cup of the soy free chocolate chips as well as the 1/2 (or so) of dried cherries.
Spoon the dough out onto ungreased cookie sheets. Bake for about 10 minutes. I baked mine for about 15 minutes per each cookie sheet because they were having a little trouble browning. Other than that, they turned out quite nice.
Let cool or just start eating if you can handle the burn. I suggest waiting at least long enough that the steam coming off the cookies subsides.
Makes about 4 dozen.
Good for sharing with nice people. If you don't know any nice people, you need to get out more! If you are offering them cookies many people can become nice. Do not be hoodwinked- only the nice people should get cookies.
I saw a shirt a while back that said "Come to the Dark Side, We have Cookies." Well said.
Have a nice weekend!
Subscribe to:
Posts (Atom)